Step-by-Step: How install Window after Linux (Ubuntu)?

Follow the step written  by http://askubuntu.com/a/700488

My computer is Lenovo Yoga Pro 3 and I encounter a big problem that my USB won’t show up in BIOS mode. I repost the step written by http://askubuntu.com/a/700488I here as I found solution to make it work with my computer. You can see my solution in Red below.

How to get Window 10 for free: https://www.youtube.com/watch?v=RqKjuxLcLJw

Note : I use “Refus” to create a bootable USB instead of the original auther which use UNetbootin.


Steps:

  1. You’ll need to download some tools.
  2. Making a Live USB and Partitioning.-Run UNetbootin (or Rufus)

    -You have two options on the main screen. We want to choose Disk Image, not distribution. Make sure it says .iso, then click the “…” button and find your Ubuntu .iso file we downloaded earlier and select it. Now make sure you’re selecting USB on the main screen and the appropriate drive letter for your USB. You can ignore making extra space, as we won’t be needing it for this. Then install that .iso file. It should only take a couple minutes.

    -Restart your PC as prompted. On restart you need to get into your Boot Menu. On my laptop this means hitting the F12 key during boot. Yours might be different. Once you’re in your bios screen select your boot device (You should see your USB). It’ll open Ubuntu and ask if you want to install or run from the USB in a trial version. Run the trial version.

    -Open Gparted from the desktop. You should see “blocks” of memory here. You want to Resize a partition (this makes room for a new one). So right click on the partition and select resize/move. You now see a min and max size. Don’t set it directly to your minimum size, leave room for expansion. At least a few GB if possible. The numbers are in MB. You can google the conversion if you need to. Now click resize/move.

    -You are now back on the GParted main screen and a new partition labeled “Unallocated” has appeared. Right click on this partition and select NEW. Create it as a PRIMARY PARTITION with a files extension of NTFS. You can set the size as well, by default it’ll use all the free space which is fine. You can add a label, but I find it easier to let the system name it. Now click add. You are back to the main screen. Click the Green checkmark to run both the resize operation and the NTFS formatting operation. If you are working on sizes with 100’s of GB this is going to take a long time (took me 1.5 hours).

  3. Installing Windows 10-Restart your PC, install the Windows 10 .iso to a USB using Rufus (same steps as in #2)
    ** Window 10 is run on UEFI and you need to select “GPT Partition Scheme for UEFI” to make it work. Don’t use defult setting**

    -Restart your PC, hammer on your Boot key (mine is F12) to enter your Bios. Select the USB from the boot list.
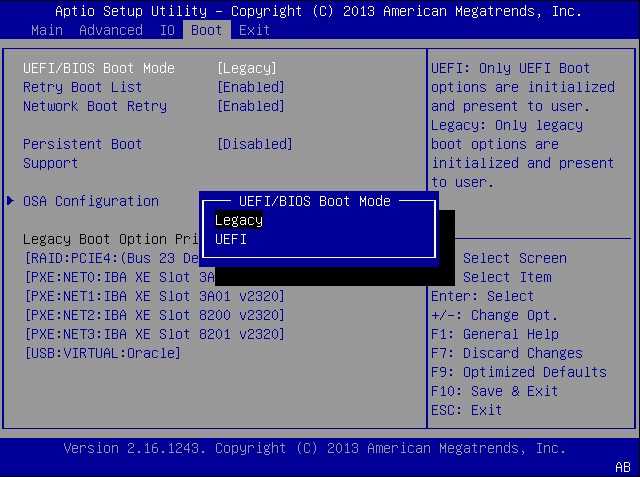
    ** Mine can’t find the Bootable USB. I need to change the Boot mode to UEFI and then restart again. ** This is because it is a Window 10.

    -Windows will walk you through installing itself. It will directly ask you to pick a partition. Select the new one you made in Step 2. When it’s done it will have altered your Boot settings and it will look like Ubuntu is missing (it’s not, don’t panic).

  4. Repairing Grub-Use UNetBootin to make a live USB for the grub boot repair .iso (see previous steps for instructions)

    -Restart your PC and hammer on your boot key (mine is F12) to enter the Bios. Select your USB from the boot list.

    -You are now in a desktop designed simply to repair GRUB for you. You the “recommended settings” button that pops up on the desktop. You’ll be prompted to connect to the internet during the repair process. They store your file in a URL for you to access later, nothing crazy. Once you’re done you should be good to go, Grub should load automatically allowing you to select your OS when you restart the computer. But if you are unlucky like me an restarting just throws you into Windows go to step 5..

  5. Changing your UEFI boot order. This should not be necessary for most people. My UEFI and BIOS just hated me. There are three methods to fixing this: Using Ubuntu, Using Windows, and Using your Bios. Ubuntu and Windows failed for me, using the BIOS directly worked.-Ubuntu Method. (Copied mostly from Cleaning up and changing the EFI boot order permanently using eifbootmgr) Open a terminal and type:
    sudo efibootmgr -v
    

You’ll see your boot order now (here’s my broken order, yours will vary):

BootOrder: 0005,0000,2001
Boot0000* Ubuntu    +Lots of other info
Boot0002* UEFI Onboard LAN IPv4   +Lots of other info   
Boot0003* UEFI Onboard LAN IPv6   +Lots of other info
Boot0005* Windows Boot Manager  +Lots of other info
Boot2001* EFI USB Device    

The line BootOrder: 0005, 0000, 2001 is our problem. It means we’re loading windows and not Ubuntu (which holds Grub) first. We need to change this. Copy this line and change the numbers as needed for your own system:

sudo efibootmgr -o 0000,0005,2001

This will change the order to Ubuntu, then Windows, then a USB. This is specific to MY system. You need to use your own numbers, but in that exact same format. You can add more commas and numbers, but don’t use any spaces and all numbers are 4 digits. Restart your PC and see if you load directly into GRUB for Ubuntu. Mine didn’t stick, so I then tried the windows method below.

Windows Method. If you boot into the Windows 10 OS, you can try configuring the UEFI Boot order manually. Unfortunately my system didn’t detect my files properly. Here is how to do it though: https://msdn.microsoft.com/en-us/library/windows/hardware/ff543428(v=vs.85).aspx

These are the instructions I followed and they do a good job. I had to go to the next step though.

BIOS Method. This method sucks because every BIOS interface is different. Restart your PC. Hammer on your BIOS key (mine is F12) to enter the boot menu. Find some sort of menu that talks about boot order. Mine was hidden in an “advanced” tab. You should see your list and Windows will be at the top. Using +/- you can change the order, place Ubuntu at the TOP. My system only uses -, but it still works. SAVE AND EXIT that screen. Exit out of your bios. You should now see the Grub Menu (since Ubuntu is the default UEFI Boot now). Select the OS you want. And then restart your PC one more time. If Grub pops up, then you’re done and good to go. Hope this helped.

Again, thanks to the community for all the support articles and friendly advice. If you wish to configure your Grub Menu please go to:

https://help.ubuntu.com/community/Grub2/Setup#Configuring_GRUB_2

it has a lot of fun options to tinker with, especially your timeout for loading into a default OS.
Salesforce

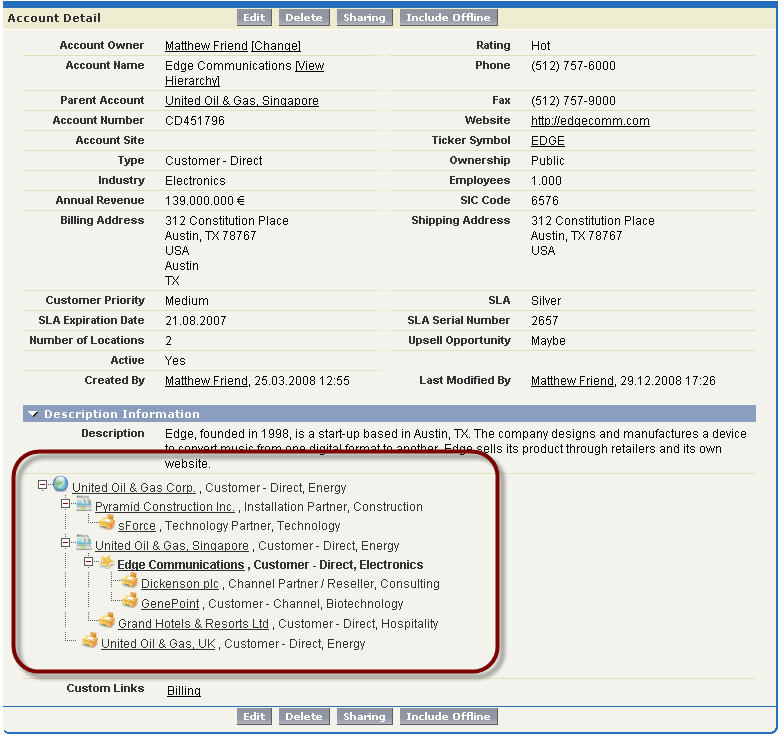
Q: How to view child accounts on parent account page?

User-added image

When you have different branch for the same company or different department you are contacting it is useful to see c

This function is called ‘Inline’. There is a useful link on how to code it. (Link) or you can download a ready-to-go plugin below.
https://appexchange.salesforce.com/listingDetail?listingId=a0N300000016chCEAQ

Inline_Account_Hierarchy


Q: Set up Contact linking with multiple Accounts

In case the contact is working in more than one company, you can use this feature to have the name appear in all account without duplicating the contact.


Link Salesforce with Social media

http://salesforce.vidyard.com/watch/9CMoKIzlVod8A0sMoWxShQ


Interactive Digital Ads.


This advertisement questions what is the real image of beauty. The content is in Thai but what attract my attention is the new Interactive Film technique.

You can tap the screen to change the image if you are using your mobile phone or tap space bar if you are watching through a computer. Check out in the link here. http://www.whatistherealimage.com/

I still can’t figure out how they did it yet, but it is pretty amazing. This is the first interactive digital campaign that I encounter which can be experienced through a mobile device. If you can change details in the video to suit your preference this could mean something big toward a customization trend. It may no longer be up to the content creator to decide which detail would suit target audience, the future power might be in the audience hand to customize how they want to receive the content. This clip shows the same content with small detail changed in each tap, but what if each tap mean a bigger change. What if each tap can show a different perspective from a different character in the clip? What if any fight in a movie can now be viewed in wide angle, villain point of view, or the hero point of view? How would that affect the way a storyline is made and filmed?

Though I have to say this advertisement would work much better with the use of Visual effects, I have to give credit to the director and the actress. It is still quite an amazing performance and editing. The interactive film really stresses out the message the ads want to convey really well and I’m really looking forward to seeing what other will be using the technique for.


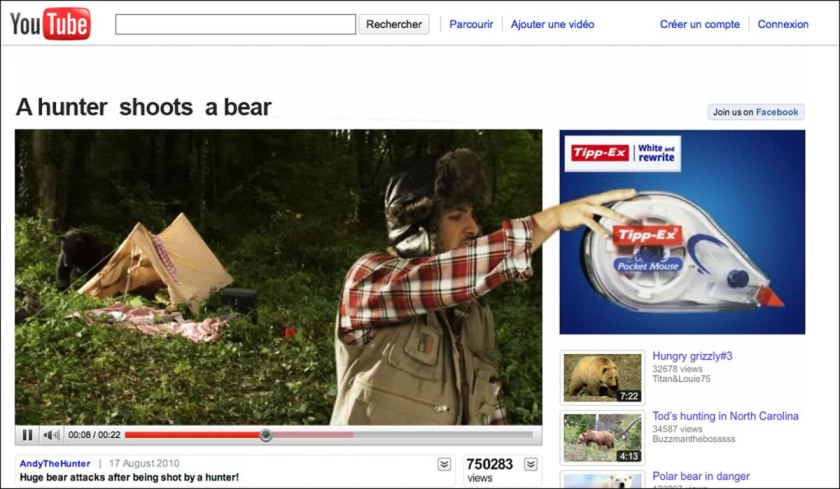
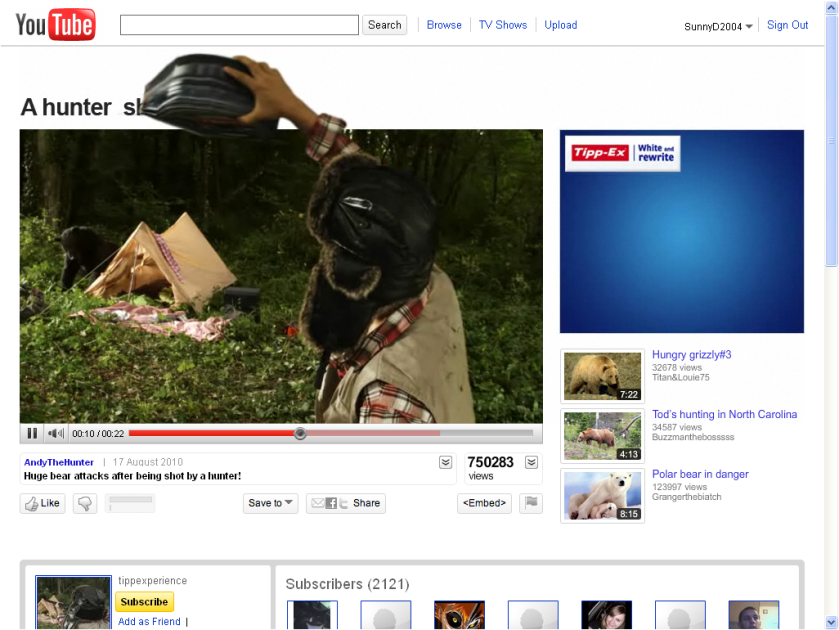
This video reminds me of an older advertisement , A Hunter Shoots a Bear by Tipp-ex. It is also an interactive video where you can type down your own choice of ending. I don’t think you can access the original content anymore but you can see it from this youtube of how it works.

30_02827_tipp-ex_pocket_mouse_-_a_hunter_shoots_a_bear_03tipp-ex-starttipp-ex-dances

Thisisnotadvertising wrote in detail on the Tipp-ex campaign which you could find more information from his/her blog.


School Bus to Mars -The coolest group VR experience

Screen Shot 2016-06-29 at 03.41.40.png

Today I got invited to a Microsoft Lift London Studio Social which has a special guest speaker, Mike Mcgee, a creative director at Framestore.

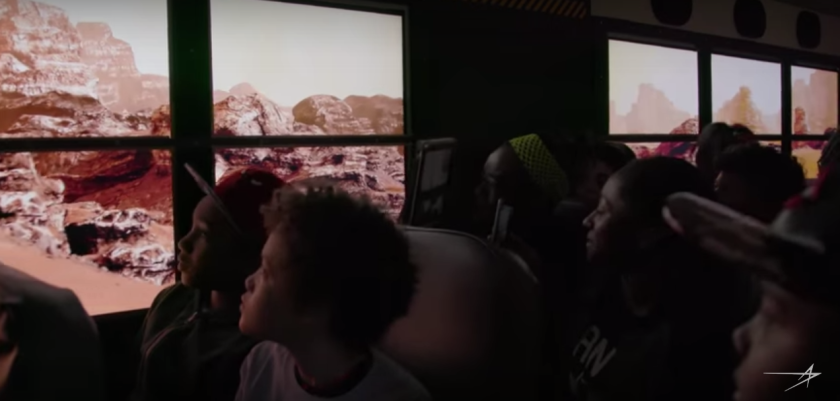
Framestore transforms a whole school bus to be a giant group immersive environment. I’m used to VR in a headset like Oculus or Samsung Gear VR which work with an individual. This is the first time I’ve seen anyone building an immersive VR experience for a group. Not to mention the way they do it is pretty amazing. All the windows are replaced with a special screen. Once turn on, all window show an environment in Mars. Framestore needed to create a virtual environment a size of a whole area in order for all windows to show a correct view regardless of where the driver decide to make a turn. By physically moving and showing an immersive environment at the same time the experience is more real than ever.

I’ve seen transparent / semi-transparent screens before but this is the first time I saw the application of it that make me cry WOW!


Brand: Lockheed Martin
Agency: McCann New York
Effects: Framestore
Read more at http://www.campaignlive.co.uk/article/1393532/school-bus-turns-mars-shuttle-lockheed-science-push#vY4zBg4BlsElTapi.99

Processing with ARToolKit


  1. Test if the camera is working

import processing.video.*;

Capture cam;

void setup() {
size(640, 480);

String[] cameras = Capture.list();

if (cameras.length == 0) {
println(“There are no cameras available for capture.”);
exit();
} else {
println(“Available cameras:”);
for (int i = 0; i < cameras.length; i++) {
println(cameras[i]);
}

// The camera can be initialized directly using an
// element from the array returned by list():
cam = new Capture(this, cameras[0]);
cam.start();
}
}

void draw() {
if (cam.available() == true) {
cam.read(); // Read image that camera see
image(cam, 0, 0); // Display image

// set(0, 0, cam); // This does the same, and is faster when just drawing the image
// without any additional resizing, transformations, or tint.

}
}

-Give you list and resolution of all detected camera


What to print first after I have my 3D printer?

Fan duct/Fan shroud

Fan duct or Fan shroud help the fan to cool printed objects. With better cooling, objects tend to have less warping and have more attractive finishing surfaces.  There are may model out there. Some look more fancy than others. So which one should you print?

Desi Quintans has conduct an experiment with different type of fan shroud with the fan by printrbot and an upgrade version. Here is the conclusion.

Without any modification from the Printrbot Simple Metal’s fan, the best option is to print the fan that is recommended by pintrbot site. Or even better, try the modified version by the auther, here

Reference: http://www.desiquintans.com/coolingtests


Spool holder

I found this model is the best. You can print everything out from any 3d printer and there is no need for extra fasteners or glue.

http://www.instructables.com/id/Universal-stand-alone-filament-spool-holder-Fully-/

All 3D printing set up you need to know (Printrbot Simple Metal)

What software is the best to use?

In general the process goes like this:

1. Create or download a model (usually a .stl file). You can download models from many sites, including youmagine.com and thingiverse.com. You can create a model using software like Blendr, SketchUp, or many others.

2. Position the model on a virtual printer bed and slice it. This is what Slic3r or Cura or Repetier or Simplify3D (among others) are for. These “slicers” generate the GCode that the printer actually uses to print the object. Some software only slices (Slic3r), other slice and control the printer (Repetier, Cura, Simplify3D). You can slice with one program and send it to the printer with another if you want. I use Simplify3D to slice and even though it can control my printer directly I don’t use it to do that – instead I use OctoPrint running on a Raspberry Pi to actually control the printer and print the objects (so I don’t need to leave my computer connected and running all the time.)

3. Send the output of the slicer (the Gcode file generated by the slicer program) to the printer. This can be done by putting it on an SD card and inserting into the printer (if it supports that), or by sending the GCode to the printer directly using software like Repetier, OctoPrint, Simplify3D, Cura, and others.

by Daniel Segel
https://printrbot.dozuki.com/Answers/View/15436/What+software+is+best+for+simple+metal

DOWNLOAD software
• Cura  – basic software that is recommended by Printrbot for beginner
• Repetier – more configuration
• Slic3r – Slice only, can’t print

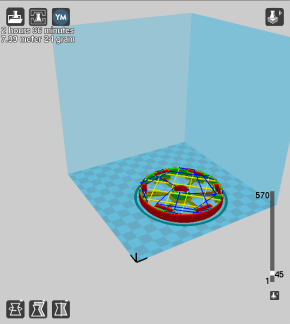
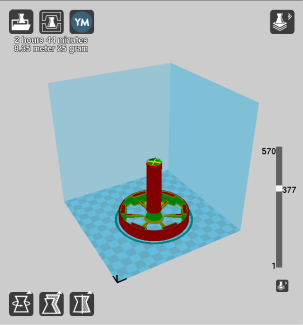
Personally, I find Cura is the easiest one to use. The only downfall is it only have one type of infill pattern, square. Be careful when you place object and click ‘Layer’ to see how the infill is arranged before you hit print. For example, a tall slender object, you might want to move around a bit to have the support located in the center of the shaft or else the shaft might be printed without any support at all.

Screen Shot 2016-05-05 at 17.41.12 Screen Shot 2016-05-05 at 17.10.54

Left: the shaft located at the empty space, so there will be no infill support in the shaft
Right: object is moved so that the cross of infill structure is in the middle therefore shaft will have infill support when printed.


How to print with SD card? (export from Cura)

If you don’t want to hook your computer with the printer at all time, print with SD card is your option.

  1. Save the gcode file in an SD card from Cura (from your computer)
  2. Put an SD card into your printer
  3. Plug your printer to power

*If you plug your printer to power first before putting an SD card in, the print will not start autometically.

See in detail with picture step by step on how to do so : https://printrbot.dozuki.com/Guide/How+to+Auto-Start+a+Print+with+an+SD+Card+using+Cura/201

Advanced setting on how to print Fast / High quality.

Basic rule is ‘ Slower = Higher Quality’.
Slower in this case means lower speed, thinner layer height.


Infill

http://my3dmatter.com/influence-infill-layer-height-pattern/ 

Scan 3D object and print it out!

I bought a new device which came with a weird cable that won’t stay in place.  So, I have a brilliant idea. Why don’t I make a charging dock for it? I have a 3D printer (which is a bit dusty now) and I could use some excuse to brush off my 3D modelling skill. So…. May this little project begin!

What I need to do is separate into 3 step:

1. Make a model of the object & charging cable
2. Design a charging dock – create a solid base that can stand, have a slot to slide the object in, and has a charging cable inside
3. 3D print it – well… print it out and see if it work


STEP 1 : Scan the object

For a complex shape, it might be better to just 3D scan it. For a simple shape, like an iPhone, it is easier to create a model yourself.

3D scan
Scan 3D object with your mobile phone. Here is a good article on how to make a 3D model of an object from your phone for free.

It comes with good picture and explanation so please go to the link to see more.
http://www.instructables.com/id/Making-a-3D-print-of-a-real-object-using-123D-Catc/

Note: Learn more about the basic of 3D scanning technology in here.
https://www.3dhubs.com/talk/thread/3d-scanning-what-technologies-use-3d-printing


Draw it yourself
Take a photo of the front, top, and side and import to 3D modeling software like solid work.

How to import the photo into solid work : https://www.youtube.com/watch?v=kLIGAx4m3MY

How to create a model from 2/3 photos in solid work : http://learnsolidworks.com/solidworks_tutorials/how-to-model-a-deodorant-roller-in-solidworks


STEP 2: Design a charging dock

The main thing to concern here is ‘How to make it stand ?’  & ‘How to get the cable in?’.

How to make it stand ?

If you don’t want to go through all the hassle of engineering calculation, here is a simple advice.

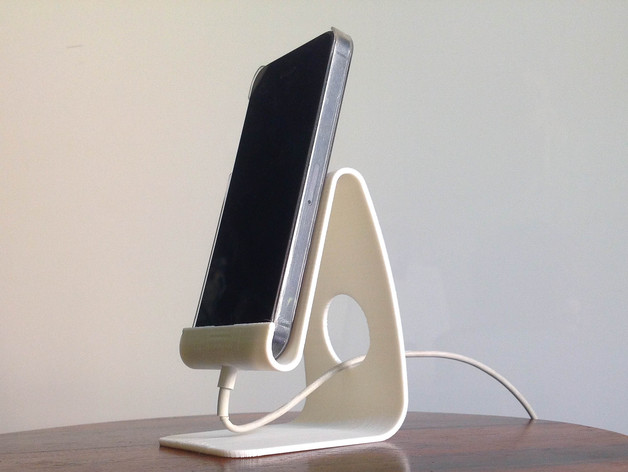
Put the object upright or lie down then tilt backward a little bit. Create a case that has a little longer back so that the object can rest in and more stable.

img_5738-2_preview_featured


How to get the cable in?
A lot of people forget to think about this part when they are making a charging dock. Yes, you do need to put the cable in there to call it a charging dock!

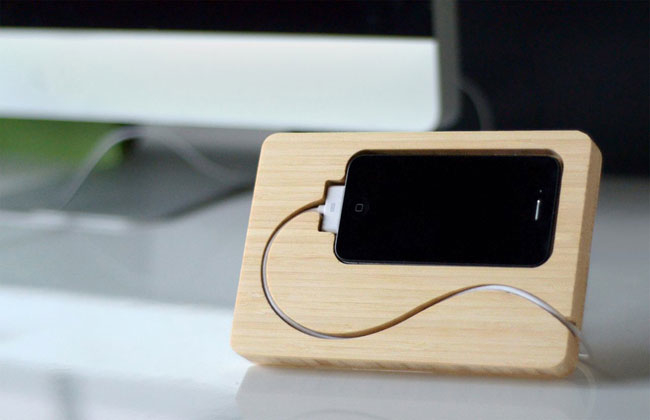
-Simple cut out

chisel-iphone 

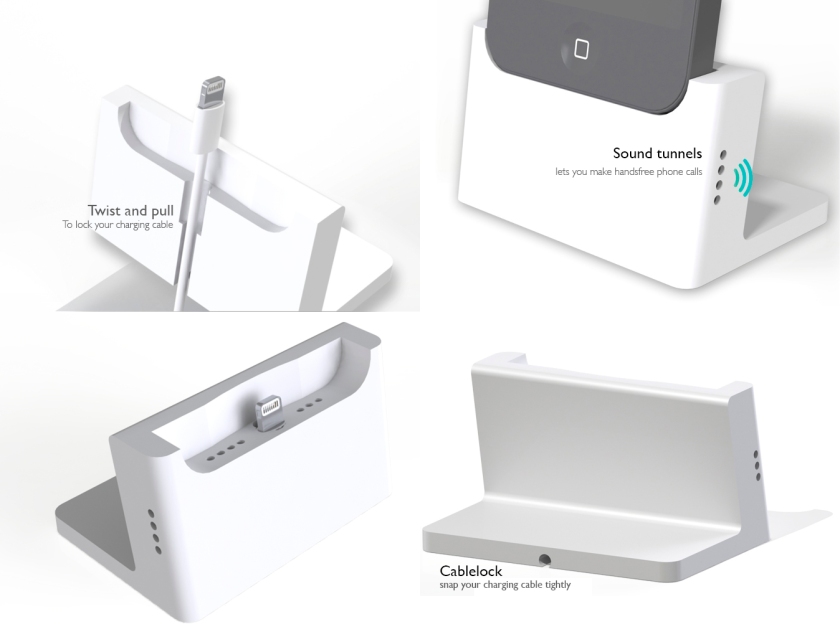
-Hidden inside

dock-for-iphone-5-collage

Credit : https://raoulrubio.wordpress.com/2013/06/18/dock-for-iphone-5/

Stitching image with OpenCV

Though I have a basic in C, I was recommended by all my programmer friends to pick it up in Python instead. There are more tutorial therefore easier to use, especially in an open source library like OpenCV.

Note: Programming have many language like a human language. They use similar logic but different way to write. Some language have feature or command that others don’t. C is the most fundamental one. Then follow by C++(the simplified version). Picture it as Latin. It is difficult to write a quick program from C/C++ as you have to write everything from scratch. On the other hand, language like Python has many pre-made feature and shorter to write. This make it easier to do a quick prototype and make things work.

Install open cv
http://www.learnopencv.com/install-opencv-3-on-yosemite-osx-10-10-x/

Compile file (Mac)
Open Terminal
Drag and drop your file
Press enter

** if permission denied — type this in terminal

cd /User/apple/prototype
chmod +x test.py
./test.py

cd = go to the folder that contains all the file that you wrote
+x = give permission to run the file
./test.py = run the file
(test.py = your file name)

Playing Video From File : Link 

if cv2.waitKey(1) & 0xFF == ord(‘q’):
break

Q:What is ‘&oxFF’?
A: There are some bugs in the library. ‘&oxFF’ is added after  ‘cv2.waitKey()’ to make it function properly.


3D Printer : Printing material (aka. Filament)

Type of filament

http://3dprintingfromscratch.com/common/3d-printer-filament-types-overview/

Flexible material:
Look like wood:


How to print ABS without heated bed?

All printer can print ABS even the manufacturer said you can’t. The main problem of printing ABS without a heating bed is it warps. The corner of the object will lift up making a curve bottom instead of a flat one. The bigger the object, the worst it gets.

There are 3 tricks to print without a heated bed. (I personally use method 2)

  1. Print with a really large brim
  2. Use a special glue (aka. ‘ABS juice’) to coat the printing bed before printing.
    (You can easily make it at home in less than 5 min.)
  3. Print the first couple of layers with PLA then change the material to print the rest with ABS

1. Large brim

2. ABS Juice

‘ABS juice’ is actually a mix of nail polish remover + some bits of ABS. Tony D. explain in youtube quite well how to make and how to use.


3. PLA then ABS

PLA helps make the print stick to the bed and there seem to be no problem mixing between PLA and ABS. (so far that I know of)

You can print the first couple of layer with PLA before changing to ABS or If you want the whole object to be printed with ABS, Select printing with platform adhesion (Support > Platform Adhesion Type > Brim or Raft)

There are 3 ways to stop the printer

• Stop the printer (temporary)
G4 S005
This will pause your printer for 5 seconds, and automatically resume after time has elapsed. 

• Slow the printer down
M220 S1
That will slow your printer down to 1% speed.
Carefully change the filament to the new color, then type
M220 S100
Resume printing in normal speed

• Download a plugin
http://wiki.ultimaker.com/CuraPlugin:_Pauseatz

Using Xiaomi/Xiaoyi IP camera on Computer

How to use your IP camera on Computer?

1. Connect wifi camera with the same wifi network with your computer.

2. Find your camera IP. http://www.mycamip.com/

3. Open the webcam through explorer

For Xiaoyi Smart Camera

Main stream:rtsp://192.168.1.128:554/ch0_0.h264
Minor stream:rtsp://192.168.1.128:554/ch0_1.h264
Audio stream:rtsp://192.168.1.128:554/ch0_3.h264

Reference http://en.miui.com/forum.php?mod=viewthread&tid=70205&highlight=rtsp

Get start with Xiaomi/Xiaoyi IP camera

http://tinkr.de/blog/getting-started-with-the-xiaomixiaoyi-smart-camerasmall-ants-camera/